
Anatomy of a Camera
What the body, lens, sensor, viewfinder, controls, and important settings actually do.
Camera parts without the menu fog.
A camera gets much less intimidating once every dial, button, and major part has a job.
This page uses the Sony A7 IV as a reference because it is a common modern mirrorless layout, but the ideas apply to most cameras. Your camera may move a button, rename a control, or hide a setting in a different menu.
Start by grouping controls by purpose: exposure controls, focus controls, review controls, body parts, and settings that change how the camera behaves.
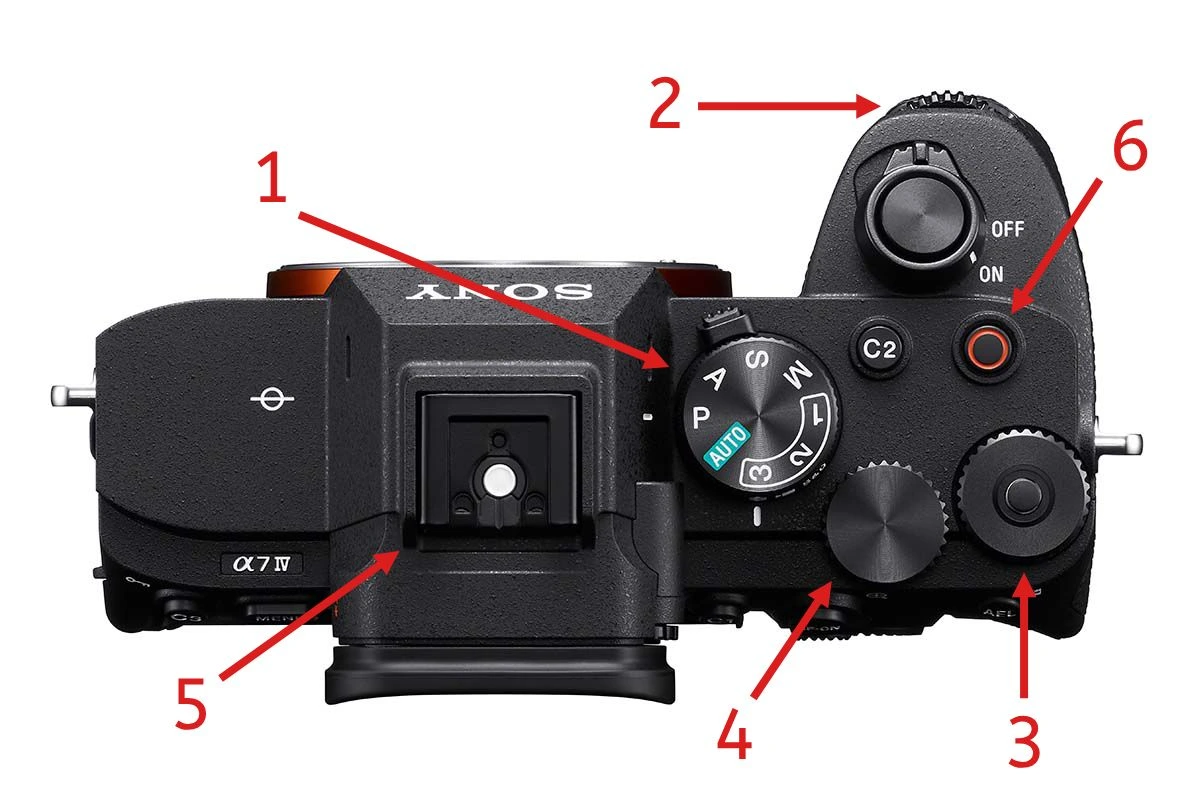
Top controls
The Dials Decide How You Shoot
The top plate is where most cameras put the controls you change while shooting. The exact layout varies, but the pattern is usually the same: one dial chooses the shooting mode, one or two dials change exposure settings, and a few buttons trigger capture or quick actions.
Switches between Auto, P, A, S, M, video, and custom modes. If you read Basics, this is where those modes live.
Usually changes aperture, shutter speed, or exposure compensation depending on the mode.
Usually changes the second exposure setting, such as shutter speed in manual mode or exposure compensation in aperture priority.
Not every camera has this. On bodies that do, it can often be customized for ISO, exposure compensation, or another frequent setting.
Mounts accessories such as a flash, trigger, microphone, or wireless transmitter. A shoe without electronic contacts is a cold shoe.
Starts video recording. Some cameras let you reassign it if you rarely shoot video.
Rear controls
The Back Handles Focus, Review, and Navigation
The back of the camera is where you compose, move focus, review images, and reach the menu. You do not need every button immediately. Learn the viewfinder, screen, joystick, playback button, and whatever control opens your quick menu.
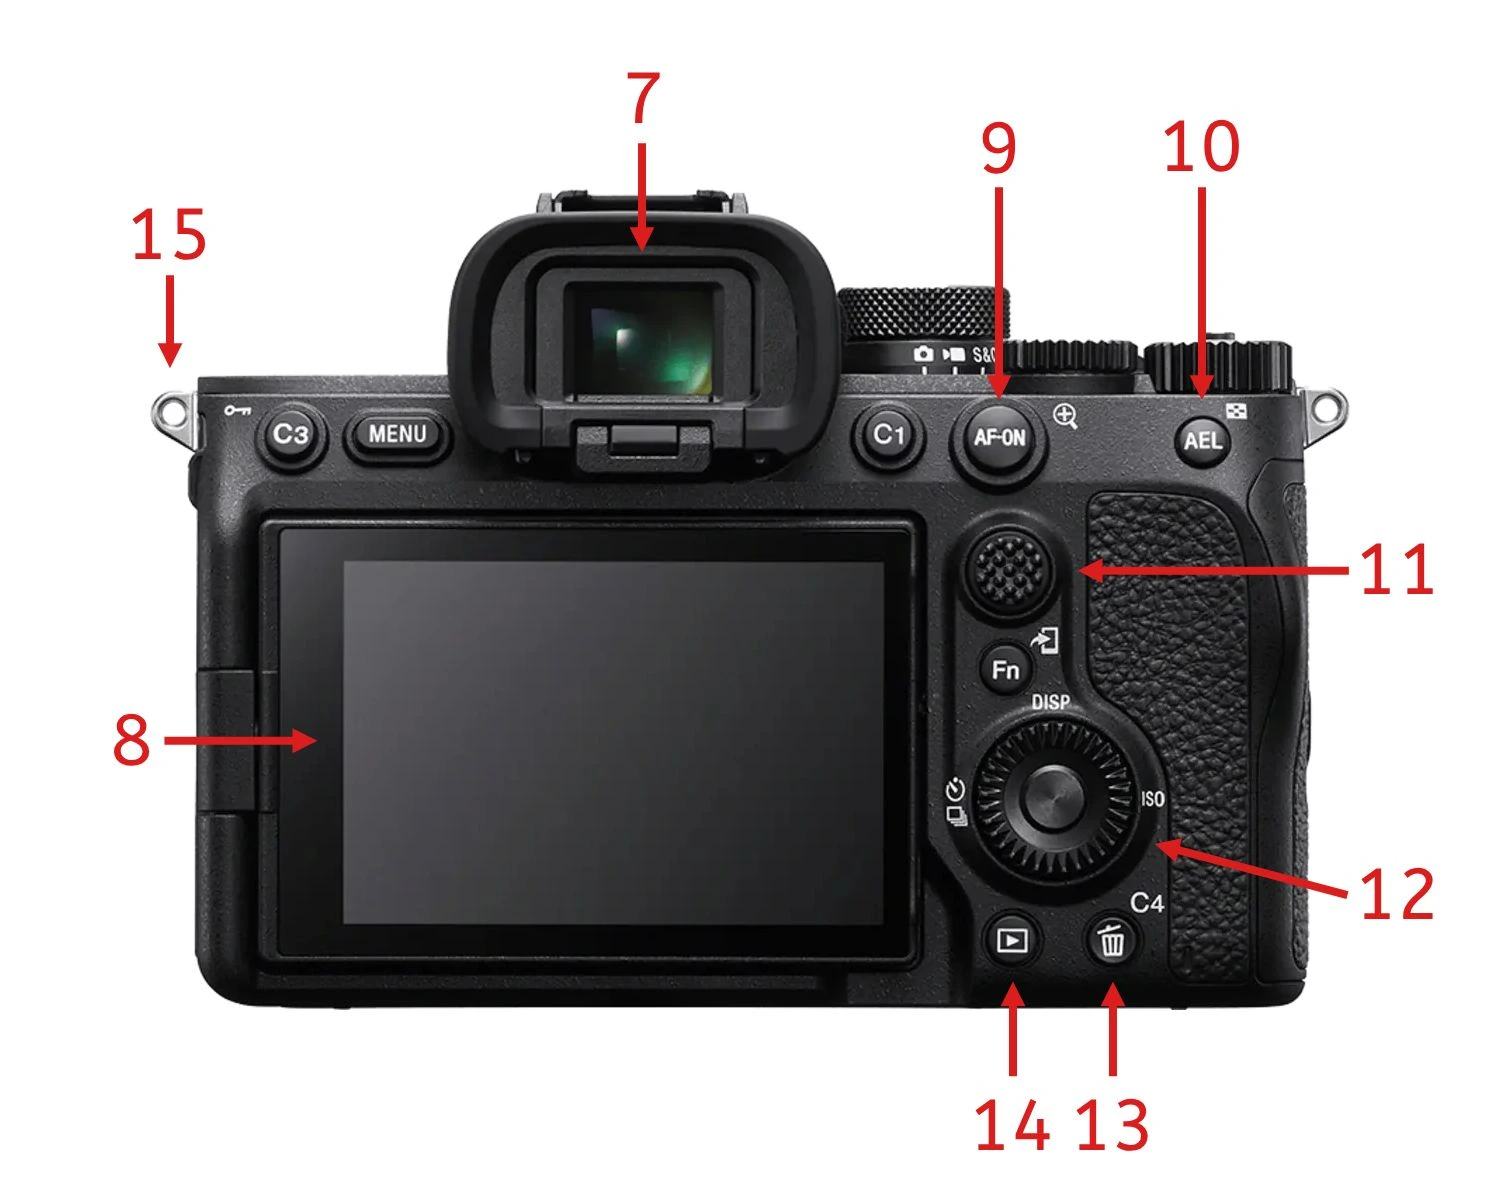
A small screen you hold to your eye for composing. It is a holdover from film and DSLR cameras, but it still helps in bright light and when you want to block out everything except the frame.
Used for live view, menus, playback, touch focus, and shooting from angles where the viewfinder is awkward.
Activates autofocus. Some photographers use this for back-button focus so focusing and taking the photo are separate actions.
Auto Exposure Lock freezes the camera's metered exposure so it does not change while you recompose.
Moves the autofocus point or navigates menus. Some beginner bodies use the rear wheel or touchscreen instead.
The control wheel navigates menus. Playback opens your gallery. Delete removes photos and often doubles as a custom button while shooting.
One of the anchor points for a strap. Boring until the day it saves your camera from the floor.
A clean beginner setup
Aperture Priority + Auto ISO Is Enough for a Lot
For portraits, campus walks, events, travel, and most everyday shooting, try Aperture Priority with Auto ISO. Use the front dial for aperture, use exposure compensation when the image is too bright or dark, and let the camera handle shutter speed inside sensible limits.
Controls depth of field and how much light the lens lets in.
Raises sensitivity only when aperture and shutter need help.
Tell the meter when the scene should not be middle gray.
Body parts
The Physical Pieces That Matter
The body is more than a box with buttons. These parts decide what lenses fit, how light reaches the sensor, how the camera saves files, and what accessories it can use.
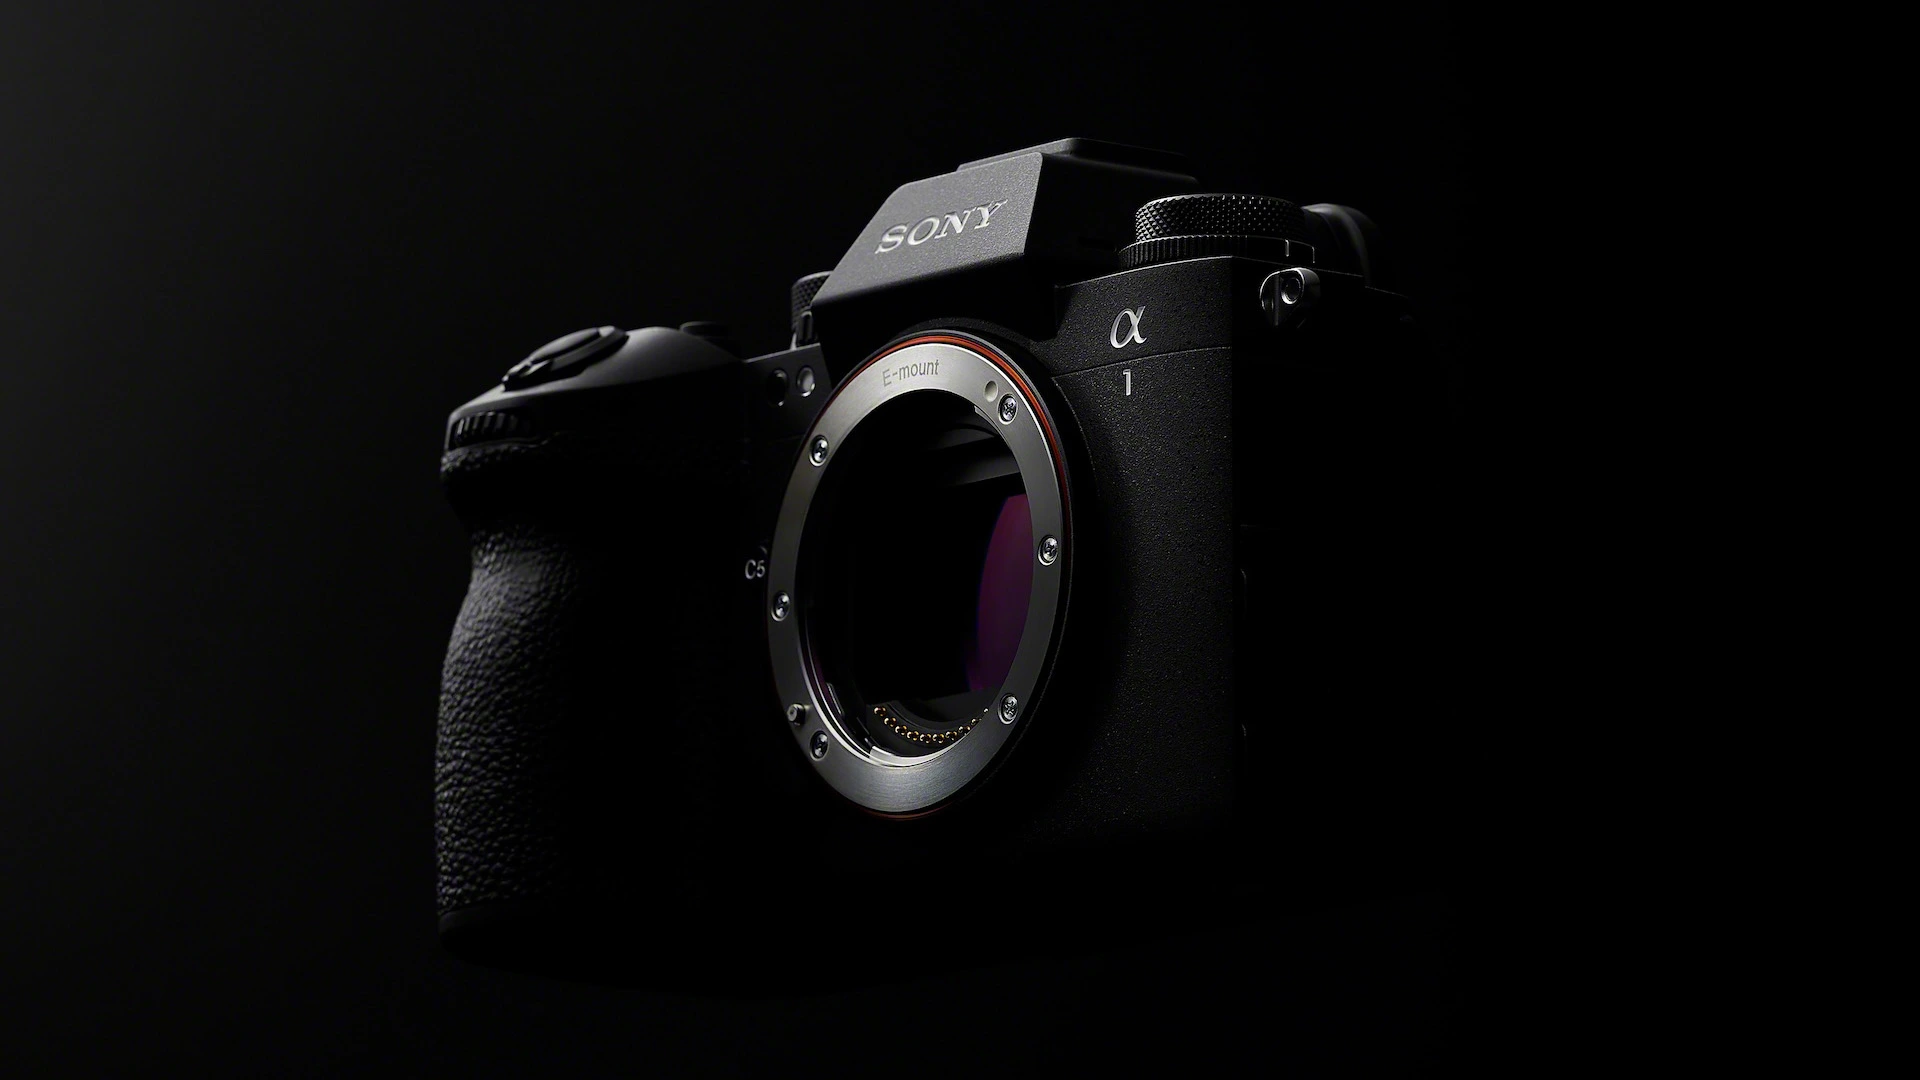
The mount holds the lens at the correct distance from the sensor and lets the body communicate with autofocus, aperture, and stabilization electronics.
The sensor records the image. Larger sensors often give more low-light flexibility and depth-of-field control, but lens choice and technique still matter.
A mechanical or electronic shutter controls exposure time. This is the physical side of the shutter speed you learn in Basics.
Use it for flash, triggers, microphones, and other accessories. Some brands also pass digital audio or control data through the shoe.
Fast cards help with bursts and video. Format cards in camera after backing them up so the file system stays clean.
Mirrorless cameras use power quickly because the screen, viewfinder, autofocus, and stabilization are active while you shoot.
Finder and screen
Two Ways to Compose the Same Photo
The viewfinder is a holdover from film and DSLR days, but it still has advantages over using the screen like a phone. It can make shooting feel more immersive by blocking out everything except your frame, it can be easier to see in bright daylight, and on many cameras it can run brighter or at a higher refresh rate than the rear screen. Some people simply prefer the experience.
Viewfinder placement also changes the camera's shape. Many cameras place it in the middle of the body like a DSLR. Rangefinder-style cameras usually have a flatter top plate and place the viewfinder off to the left side.
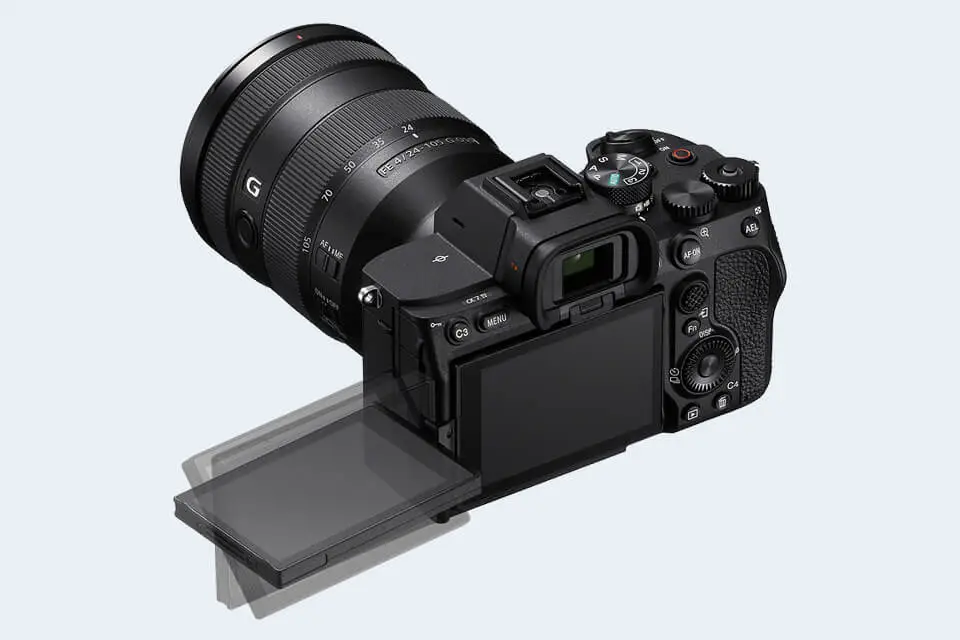
The rear screen is better for low angles, high angles, video, menus, and touch focus. Fully articulating screens can flip to the side and rotate, which is useful for awkward compositions and filming yourself.
Best for bright daylight, steady handholding, and immersive framing.
Best for touch controls, low/high perspectives, video, and tripod work.
Important settings
Settings Worth Finding Early
Modern cameras have deep menus, but a beginner does not need to master all of them. These settings change day-to-day shooting more than most hidden menu items.
Leave it on for handheld shooting. It reduces blur from your hands, especially at slower shutter speeds, but it cannot freeze a moving subject.
Use single AF for still subjects and continuous AF for people, events, sports, wildlife, or anything moving toward or away from you.
If your camera has eye, face, animal, vehicle, or bird detection, assign it to a quick button or menu so you can change it without digging.
Shoot Raw if you want more editing flexibility. Shoot JPEG when you want smaller files and finished-looking images straight from camera.
Once the controls feel less mysterious, the next useful move is practice: set the camera to aperture priority, take the same scene at a few apertures and exposure-compensation values, then review what changed. For the exposure side, go back to Basics.